
Creating an Epic Entertainment Hub: Tips for Setting Up a Projector in Your Basement

Setting up a projector in your basement can transform the space into a fantastic entertainment hub. That's because it allows you to enjoy immersive movie nights, play video games on a larger screen, or create a home theater experience.
However, setting up your projector correctly is essential to maximize its performance and ensure an optimal viewing experience. This article will provide valuable tips and guidance on setting up a projector in your basement. Let's start exploring!
Top 3 Best Portable Projectors You Can Buy
Here are the top 3 portable projectors:
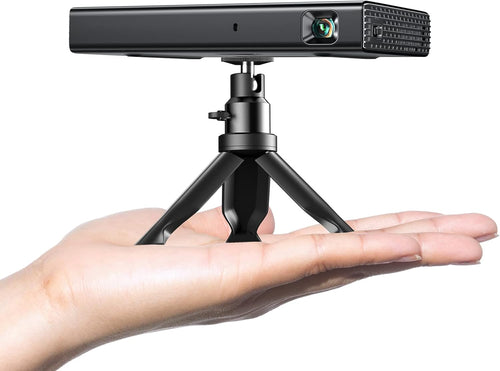
1. Piqo Smallest Projector
The Piqo mini Projector is a revolutionary must-have for any home entertainment setup. Its 500 lumens of LED light power provides crystal clear vibrancy with better picture quality than other portable projectors. Moreover, the four-hour battery life and mini size make it easily portable and easy to create the perfect entertainment hub in your basement.
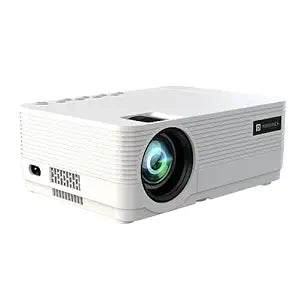
2. ViewSonic M1+ Portable Projector
The ViewSonic M1+ Portable Projector is the perfect addition to your home entertainment center. With dual Harman Kardon speakers and Bluetooth connectivity, this projector provides an incredible audio-visual experience. The brightness of 250 lumens makes it easy to share HD content with everyone in your basement.
3. LG PF50KA Portable Projector
LG PF50KA Portable Projector is another excellent option for your basement entertainment center. Its versatile design and portability make it great for the basement, allowing you to set up a movie theater in your home. With features like AI Voice Control, Quad-Core Processor, and Dual Harman Kardon Speakers, you can be sure of an astoundingly immersive experience!
Tips for Setting Up a Projector in Your Basement
Let’s explore the expert tips for setting up a projector in your basement:
1. Choosing the Right Projector
Before setting up your basement projector, selecting a projector that suits your needs is essential. Consider brightness, resolution, throw distance, and connectivity options. Opt for a projector with sufficient brightness to counter ambient light in your basement and a resolution that delivers crisp and clear images.
2. Determining the Ideal Projector Placement
The placement of your projector significantly impacts the viewing experience. Take into account the throw distance, screen size, and seating arrangement. Calculate the throw ratio to determine the optimal distance between the projector and the screen. Mount the projector securely on a ceiling mount or use a sturdy stand to achieve the desired height and angle.
3. Preparing the Basement Space
Before setting up the projector, prepare your basement space by decluttering and organizing it. Remove any obstructions or objects that may interfere with the projected image. Consider painting the walls with a neutral color to enhance image quality and reduce reflections. Additionally, ensure proper ventilation and temperature control to prevent overheating.
4. Setting Up the Projector Screen
Choose a suitable projector screen or create a DIY solution using high-quality materials. Measure the available space to determine the appropriate screen size. Install the screen securely on a wall or use a portable screen that can be easily adjusted and stored. Ensure the screen is properly tensioned to avoid any wrinkles or distortions.
5. Connecting Audio and Video Sources
Connect your projector to audio and video sources such as Blu-ray players and gaming consoles. Use high-quality HDMI cables for optimal signal transmission. Consider using an AV receiver or soundbar to enhance the audio experience. Ensure all connections are secure and test them before finalizing the setup.
6. Adjusting Image and Focus
Once your projector is connected, adjust the image size and focus. Most projectors offer manual zoom and focus controls. Experiment with different settings to achieve the desired image size and clarity. Ensure the image is centered and aligned correctly on the screen. Use the projector's keystone correction feature to correct any distortion caused by an angled projection.
7. Fine-tuning the Picture Quality
To optimize the picture quality, explore the projector's settings menu. Adjust brightness, contrast, color saturation, and sharpness to achieve vibrant and balanced visuals. Take advantage of preset image modes tailored to different content types, such as movies, games, or presentations. Perform periodic calibration to maintain optimal performance.
8. Optimizing Lighting Conditions
Controlling lighting conditions in your basement is crucial for an immersive viewing experience. Install blackout curtains or blinds to block out external light sources. Use dimmable lighting fixtures or LED strips to create a cozy ambiance without causing glare on the screen. Experiment with different lighting setups until you find the perfect balance between comfort and picture quality.
9. Managing Cables and Wiring
Organize and manage the cables and wiring associated with your projector setup. Conceal cables using cable management solutions. Label cables for easy identification and troubleshooting. Avoid running cables across walkways or areas prone to foot traffic. Keep the setup neat and tidy to minimize the risk of accidents and cable damage.
10. Calibrating Audio Settings
To achieve optimal sound quality, calibrate the audio settings of your projector and audio devices. Adjust the volume levels, equalizer settings, and sound modes to suit your preferences.
Consider adding additional speakers or a subwoofer for a more immersive audio experience. Conduct sound tests to ensure balanced audio distribution throughout the basement.
11. Controlling Ambient Noise
Minimize ambient noise in your basement to enhance the overall viewing experience. Install acoustic panels or sound-absorbing materials on the walls to reduce echoes and unwanted reflections. Place rugs or carpets on the floor to absorb footstep sounds. Consider using a white noise machine or background music to mask any remaining noise from external sources.
12. Enhancing the Viewing Experience
Go the extra mile to enhance your basement projector setup. Invest in comfortable seating options such as recliners or cozy couches. Install a mini-fridge or snack bar for easy access to refreshments. Add a popcorn machine or a dedicated snack corner for an authentic theater experience. Customize the space to suit your preferences and create a welcoming ambiance.
13. Maintenance and Cleaning
Regular maintenance and cleaning ensure the longevity and optimal performance of your projector. Refer to the manufacturer's guidelines for specific maintenance tasks such as filter cleaning and lamp replacement. Dust the projector and screen regularly to prevent debris from affecting image quality. Keep the basement environment clean and free from excessive dust or moisture.
14. Troubleshooting Common Issues
You may encounter common issues with your basement projector despite the careful setup. Some cases include image flickering, color distortion, or connectivity problems. Refer to the projector's manual or contact customer support for troubleshooting guidance. Online forums and communities are also excellent resources for solving specific problems.
Benefits of Homemade Entertainment Centers
There are numerous benefits of homemade entertainment centers. Let’s explore a few of them:
1. Customization and Personalization
One of the primary advantages of homemade entertainment centers is the ability to customize and personalize the design. When building your entertainment center, you have full control over its size, shape, layout, and overall aesthetics.
You can tailor it to match your existing home decor, ensuring seamless integration with your interior design. Additionally, you can incorporate specific features like adjustable shelves, cable management systems, and hidden compartments based on your unique requirements.
2. Cost-Effectiveness
Building a homemade entertainment center can be a cost-effective alternative to purchasing a pre-made one. While the upfront investment may include materials and tools, the long-term savings can be significant.
Store-bought entertainment centers often come with a premium price tag, which consists of the cost of manufacturing, marketing, and profit margins. By constructing your entertainment center, you can bypass these additional expenses and allocate your budget toward higher-quality materials or other features.
3. Quality and Durability
When you build an entertainment center from scratch, you control the materials used and the construction process. It lets you prioritize quality and durability, ensuring sturdy and long-lasting furniture.
You can construct homemade entertainment centers using solid wood or other high-quality materials, offering better structural integrity than mass-produced options. With proper care and maintenance, a homemade entertainment center can withstand the test of time and provide reliable support for your entertainment devices.
4. Efficient Use of Space
Another benefit of homemade entertainment centers is the efficient use of space. These centers are designed to fit perfectly in your available space, making the most of every inch.
Customizing the dimensions ensures that the entertainment center complements the room's layout and maximizes storage capacity. Whether you have a small apartment or a spacious living room, a homemade entertainment center optimizes your available space.
5. Enhanced Functionality
Homemade entertainment centers offer enhanced functionality compared to their off-the-shelf counterparts. As the creator, you can design the center to accommodate all your entertainment needs and preferences.
This may include dedicated spaces for gaming consoles, speakers, DVD collections, or even a home theater setup. By tailoring the features and layout to your specific requirements, you can create a functional and efficient entertainment center that enhances your overall entertainment experience.
6. Flexibility and Adaptability
One of the notable advantages of homemade entertainment centers is their flexibility and adaptability. Unlike pre-made options, which may have limited customization options, homemade centers can easily evolve as your needs change.
Add or modify compartments, shelves, or wiring systems to accommodate new devices or technology upgrades. This flexibility ensures that your entertainment center remains relevant and functional for years.
Final Thoughts
Setting up a projector in your basement can elevate your entertainment experience. By carefully selecting the right equipment, optimizing the space, and paying attention to audio and visual settings, you can create an epic entertainment hub to impress your family and friends. Get ready to immerse yourself in a world of captivating movies, thrilling sports events, and exhilarating gaming sessions right in the comfort of your basement!